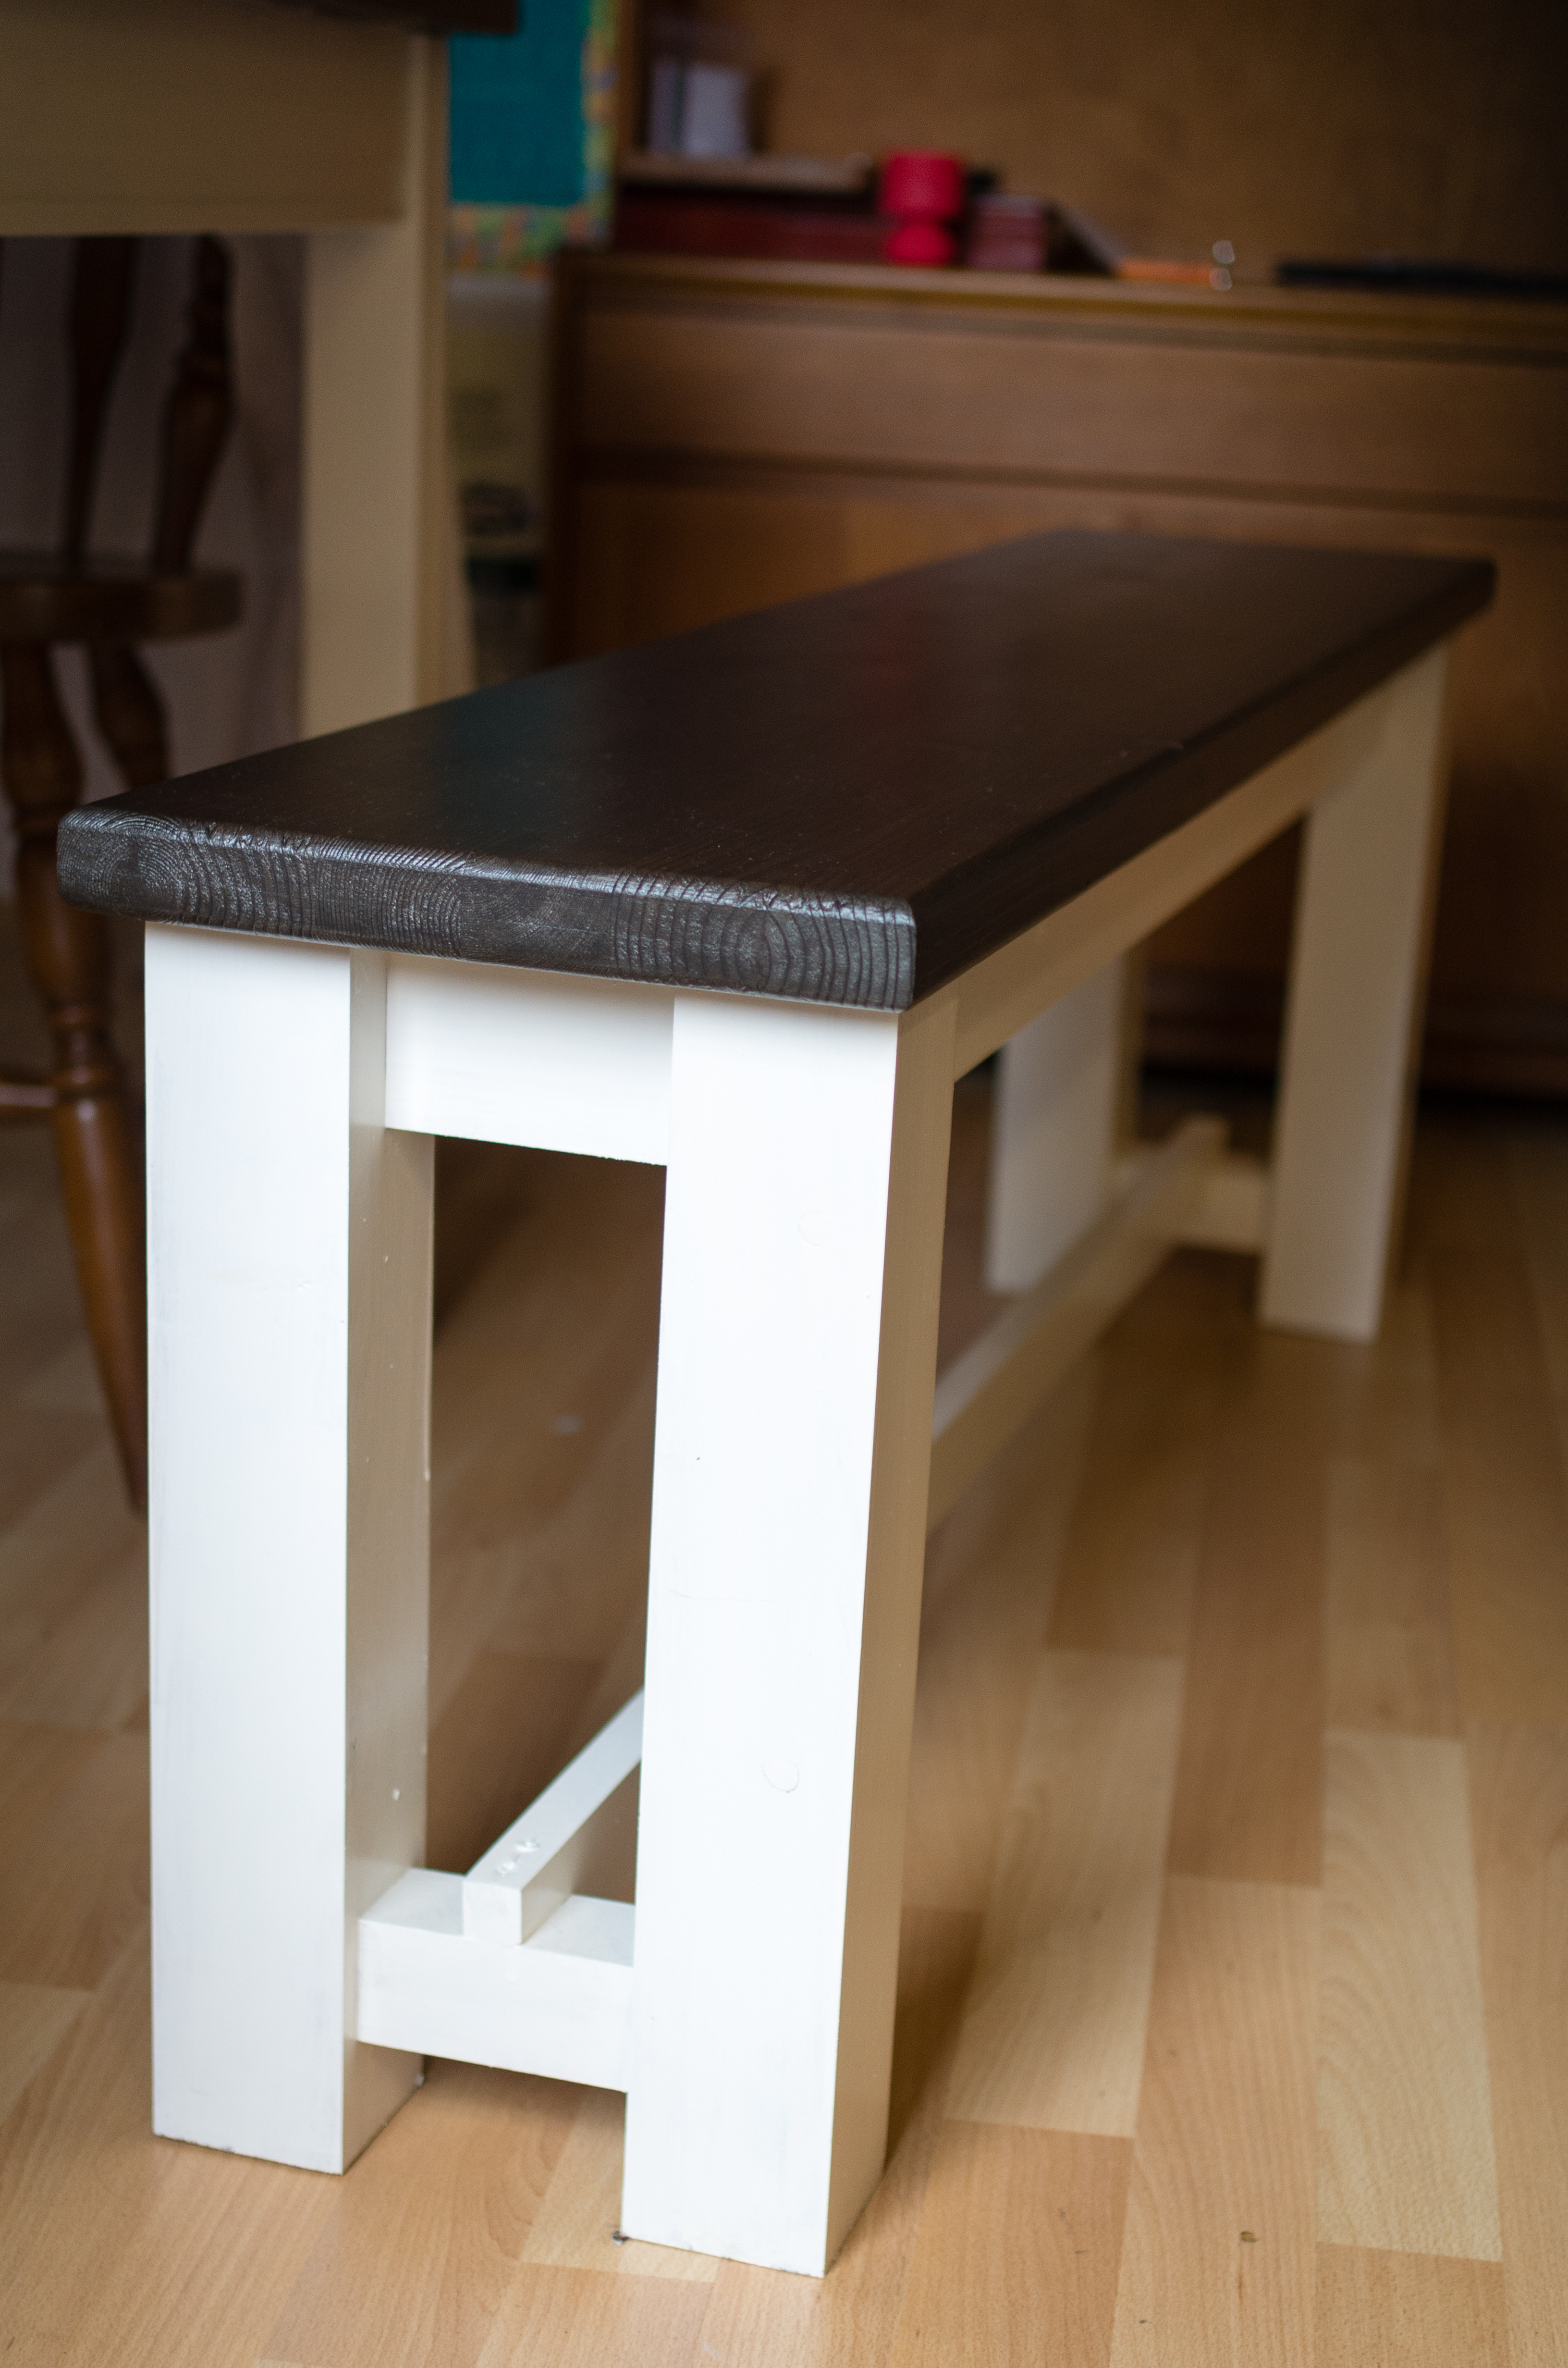
After getting my hands on a farmhouse table that needed re-finishing I decided to knock up a pair of benches to go with it, thinking of the two-tone farmhouse style that’s pretty popular at the moment.
So this project was to design and fabricate some benches.
Tooling
After some enthusiastic talk about DIY I’ve picked up quite a few hand-me-down power tools from a number of relatives and bought one or two more myself – so now we can get a little more creative in the scope of the projects!
So for this project I used:
- A power drill,
- A router – with round-over bit,
- A sliding mitre saw,
- A random orbit sander,
- A set of chisels.
Design
So there are some fairly standard and simple designs for benches around, but for these I wanted to hide the basic frame within the legs – which mainly revolves around a lot of chiselling – as this can produce some really tidy results.
The working design for this project:
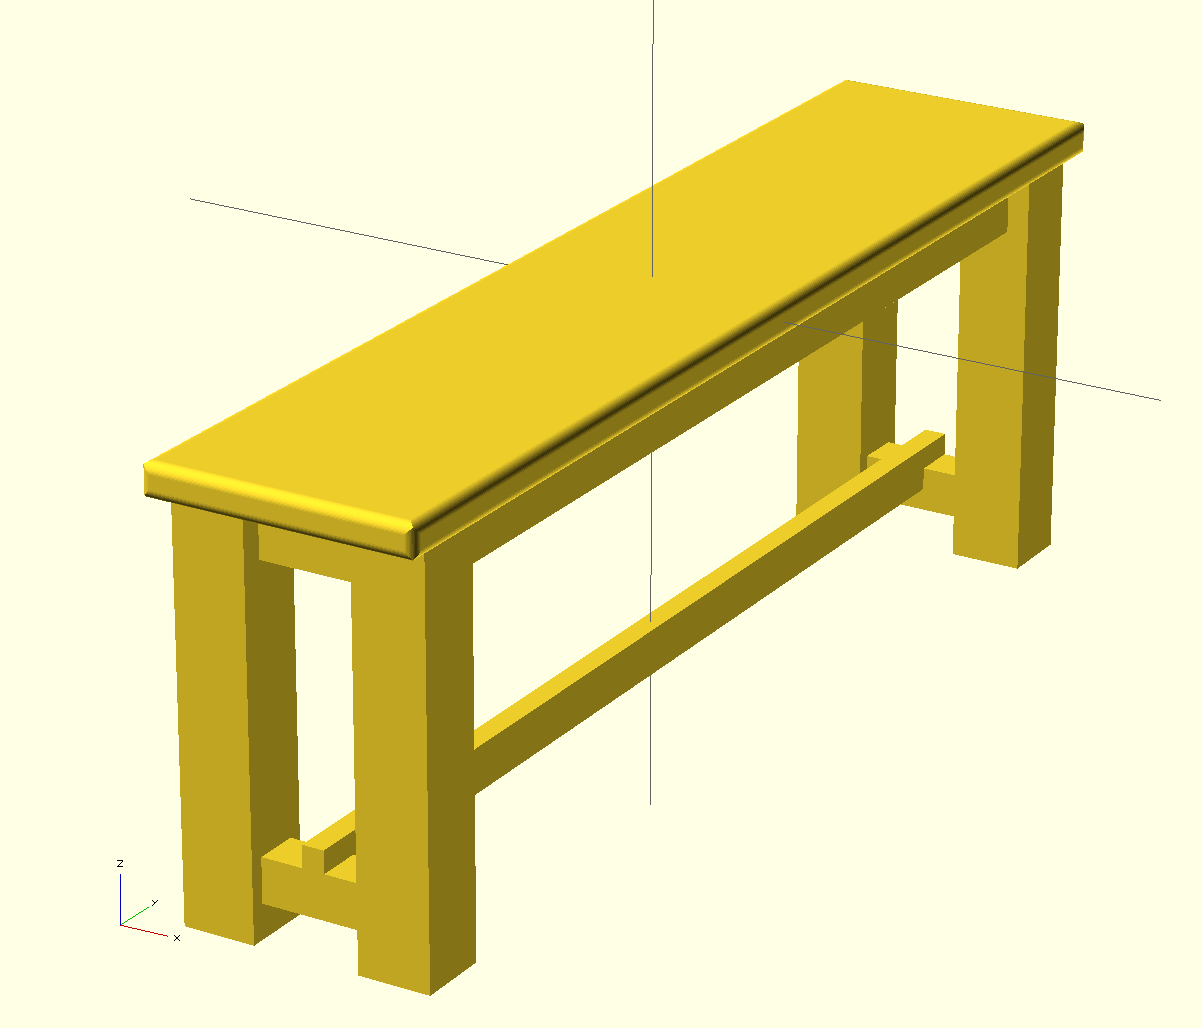

Dimensions
Overall dimensions 1200 mm wide x 270 mm deep x 450 mm tall.
Now for the sizes of the individual pieces I tend to think in terms of the size before planing – where 2″ x 2″ is basically 50 mm x 50 mm – but this has confused a number of people in the past so I’ll stick with the sizes after planing all round (referred to as PAR), for example a 50 x 50 mm beam comes out between 44 x 44 mm and 46 x 46 mm.
Components:
- The top piece is some 38 x 270 mm pre-laminated board – makes for some interesting finished results as the laminated chunks are 38 x 46 mm, leading to some nice variations in grain across the board,
- The legs are 72 x 72 mm,
- The main frame is made from 72 x 20 mm boards.
- The connectors between the legs are 44 x 44 mm,
- The support beam at foot level is 20 x 44 mm.
Construction
Exploded views make the joints considerably clearer.

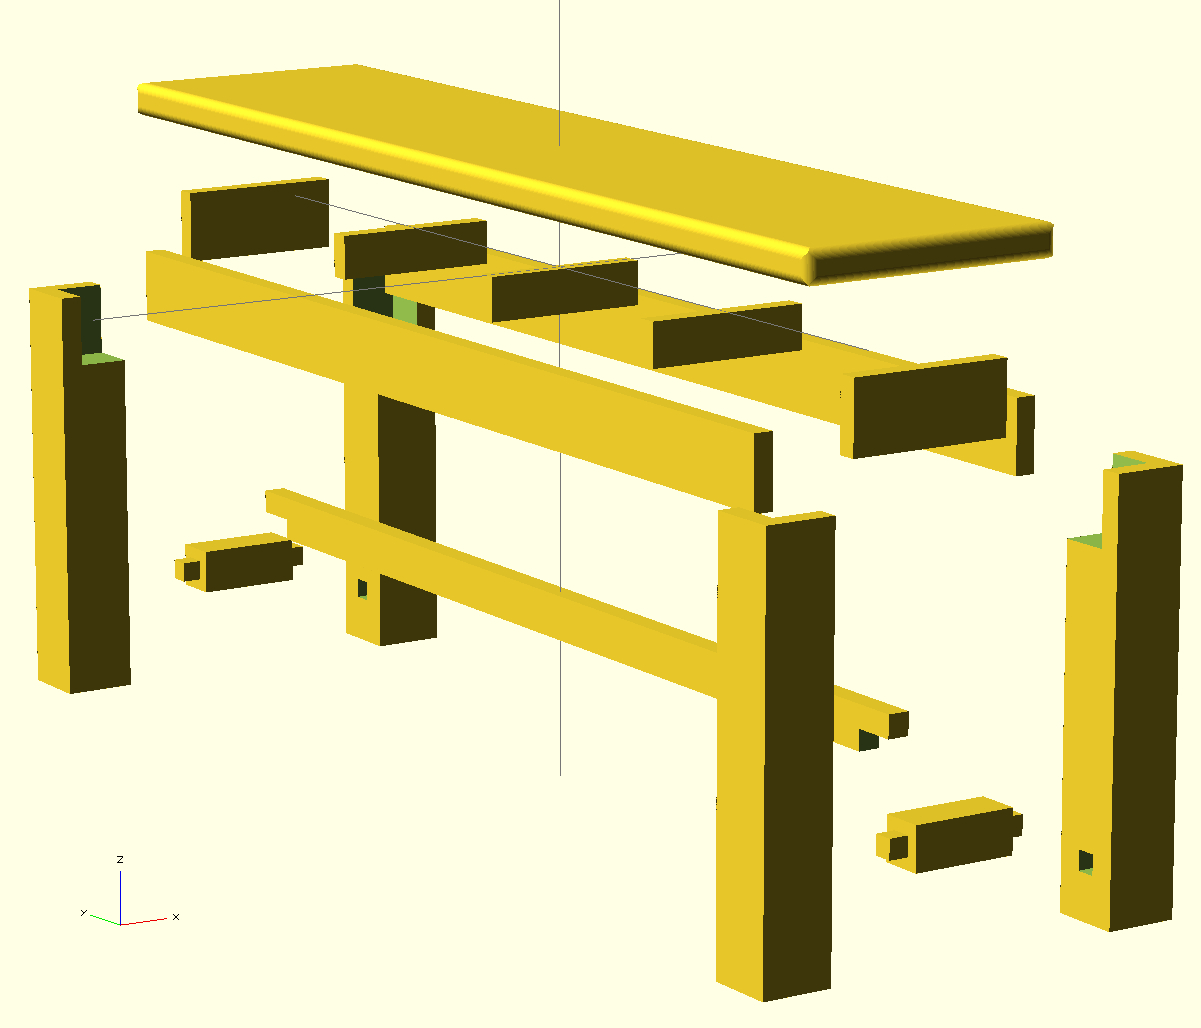
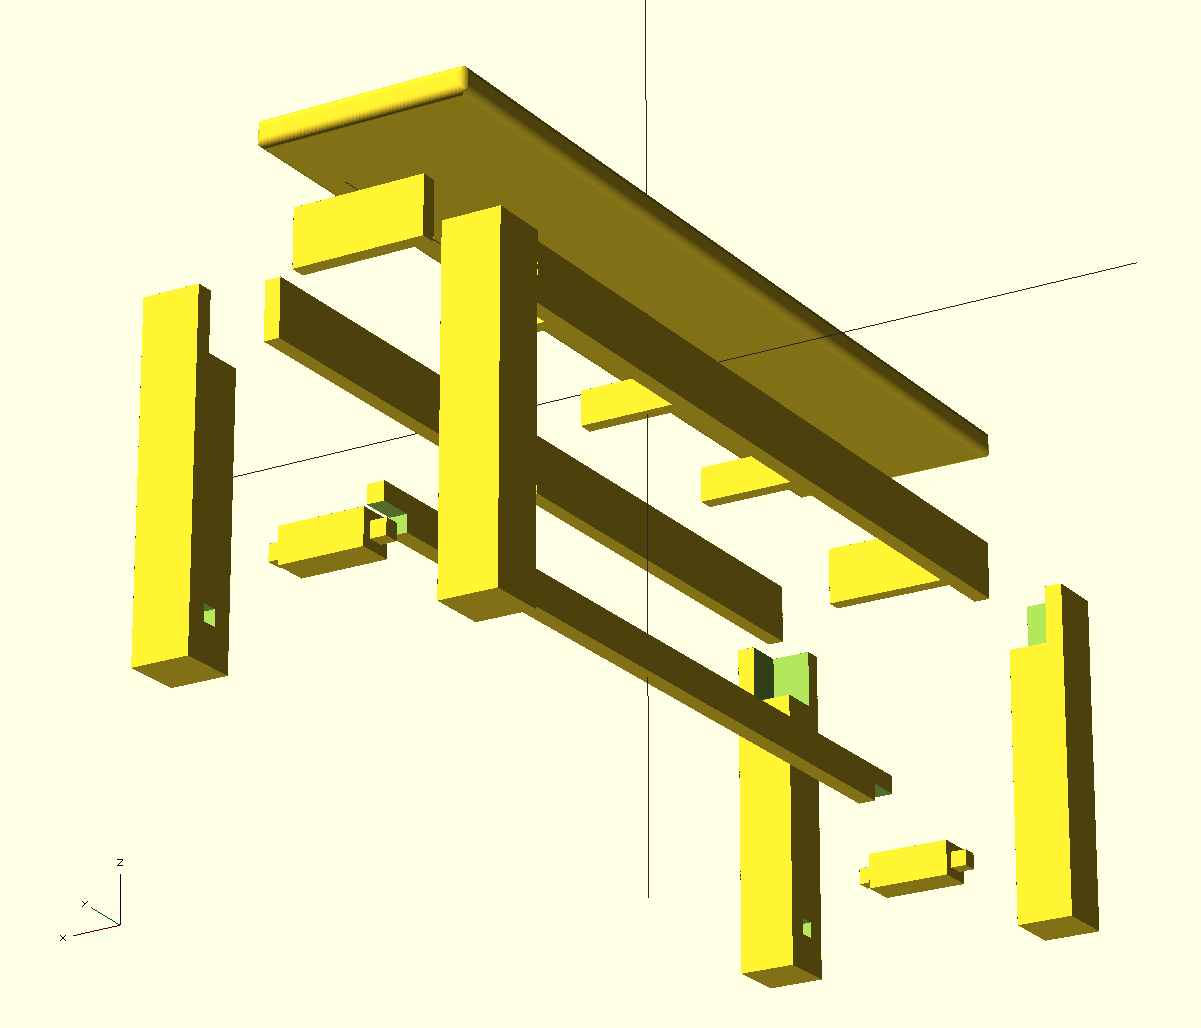
The main frame is hidden within the legs by chiselling large blocks (50 x 50 x 72 mm) from the tops of the legs. The sides and ends of the frame are screw into the rebated sections of the legs to provide a sturdy framework. The additional smaller cross pieces are included to fix the separation of the longer sides, and provide additional means to attach the seat (top piece). The leg connectors at the bottom are fixed by mortice and tenon joints and the low level support beam screwed into these leg connectors. The seat (after finishing separately) is then attached to the main frame and cross pieces of the frame by modesty blocks.
Finishing
So the main frame of the bench was sanded roughly before painting an off white. While the seat was sanded to 120 grit before staining (twice) with Mann’s Medium Oak pine stain, then several coats of Mann’s extra tough, satin finish, varnish (with some buffing in between) to give a smooth fairly glossy finish.

After the benches were finished I stripped the table with white spirit and a LOT of sanding, so I could apply the same two-tone finish as the benches.
